US$7.99
Klantbeoordelingen
- Alle beoordelingen(74)
- Afbeeldingen
- Videos
Sorteren op:
Recensies alleen uit uw land (United States)
|
Toon origineel
Een deel van de recensie is automatisch vertaald.
-
01/12/2020
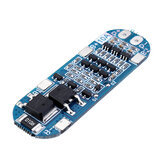
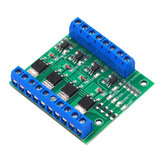
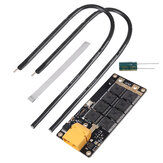
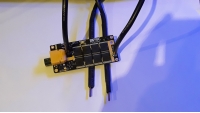
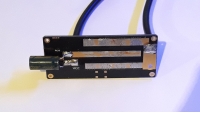
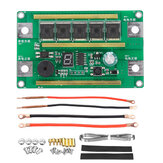
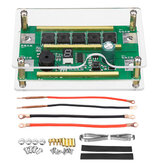
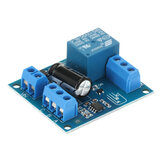
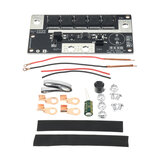
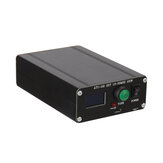
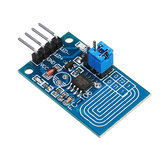
The spot welder works like a charm. Before using, make sure to solder the capacitor to the input of the device. I spot welded a 1.5 mm thick nickel strip with the LVL 3 power (Blue colour). For the best result use a big 4s lipo Battery. I used a 5000 mAh 60C lipo. You need at lease 150A discharge current for the device to work properly (You can calculate the max discharge current by multiplying the capacity with the C rating. For example, if the Lipo has 2000mAh and 100C the calculation should look like this: 2000mAh * 100C = 200A). The cables of the spot welder get a bit warm after a few spot welds on LVL 3 power output. The device should be able to spot weld more than 2.5 mm thick nickel strip with eas. How to use: - Connect the Battery (Obviously) - Press on the button to select your Mode/LVL (I used LVL 3 for a 1.5mm thick nickel strip. Test your welds on two nickel strips) - Press the two pins firmly on the nickel strip. NO GAP should be between the two things you want to spot weld. - When the led flashes up, the spot weld should be done. Congrats you made your first spot weld ;)
Reacties (3)Toon origineel -
06/10/2020
it works well, using 4S lipo battery. when using first and second level of power, device and battery do not get too much hot, so you could make many spot weldings.
ReactiesToon origineel -
24/06/2020
Was great for few test welds and then began to sparks fly from PCB, one small transistor melted and few mosfets went hot and bit smoke. I read one review where was similar case like i have, not sure did we just get bad monday items or what. Small minus, does not contain any instructions, for example what led colors means would be great.
Reacties (3)Toon origineel -
 paulVIP3GB12/06/2020
not to happy with item no one knows where to solder capacitor! finaley figured it out , worked great firs time then burned out 2 x fets on second try!
ReactiesToon origineel -
JamesVIP3US01/08/2020
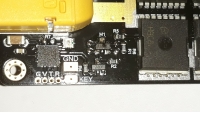
Seems to do what I need done using the Red and Green settings. Purple BLOWS holes in 18650 cells. LOL Bet folks would be willing to pay a extra dollar for documented instructions ? I located the Cap on the underside.
ReactiesToon origineel -
05/11/2021
Dear sir, I have ordered spot welding pcb and pen but I have received only spot welding pen. what I can do now?
ReactiesToon origineel -
BrakulVIP3DE16/01/2021
Sehr gute und günstige Lösung, durch die Möglichkeit die Schweißzeit einzustellen lässt sich die Leistung gut regulieren. Der strom lässt sich über den Ladezustand der Akkus und der Kapazität/c raten beeinflussen. Was am Anfang etwas probieren erfordert. Am besten erstmal nur die Nikelstreifen verschweißen da bei zu höhen Einstellungen die zu verscheschweißende Zelle beschädigt werden kann.
ReactiesToon origineel -
 06/08/2020
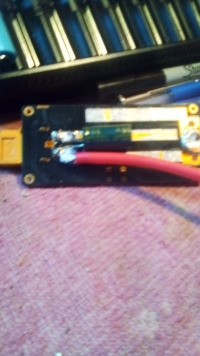
This board is very nice, and works quite well. So far very happy with this board. The mounting holes are very small. The positive is a 2mm hole, and the negative is 3mm. I made a brass extender for the positive on my Mini Lathe. Used a 3mm brass riser and turned down the 3mm screw end to 2mm to fit the hole on the board. I then soldered this to the board, so I had a 3mm location to mount the positive connection. I had some welding tips from another board that failed, So I used those. Had to use large washers to allow a 3mm hex head to fit. As the mounting the Capacitor, I had to look at another review to see how it was done. Seems to work. It's soldered to the bottom, plus to battery positive, and minus to battery negative. The operation is simple. It only gives one pulse when the green LED blinks. The plus length for the RED setting is 10ms, and goes up 10ms for every press of the button. So the plus length is 10ms to 70ms in 10ms steps. I use a 5000mAh S3 Lipo that is at 11.3v. And it takes the full 70ms pulse to do a good weld with 0.2mm nickel strip. The board does not even get warm when welding. I'm sure I'll have to adjust if the battery is at a higher charge. If you use a 4S you may have to use the low settings.
ReactiesToon origineel -
27/08/2021
Product received.Looks ok like always.Not tested yet.Thanks banggood.
Reacties (1)Toon origineel -
24/06/2021
I buy circuit board and pen but you only send me a welding pen
ReactiesToon origineel


Show:
Wellicht ben je ook geïnteresseerd in
-
 US$38.00
 -
US$19.99
-
US$13.99
-
US$16.99
-
US$5.99
-
US$6.99
-
US$10.99
-
US$3.99
-
US$2.99
-
US$11.99
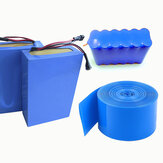
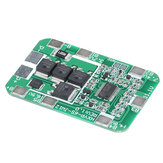
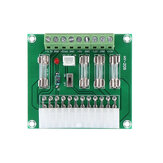
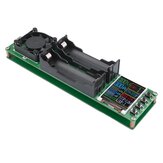
DIY Draagbare Batterij Opslagpunt Lasmachine PCB Circuit Board Lasmachines voor 18650 26650 12V
-
US$6.99
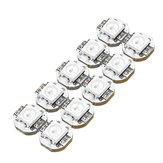
50 stuks Geekcreit® DC 5V 3MM x 10MM WS2812B SMD LED-bord Ingebouwde IC-WS2812
-
US$64.99
-
US$0.99
-
US$1.40
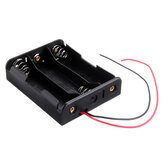
4 Slots AA Batterij Box Batterijhouder Bord met Schakelaar voor 4xAA Batterijen DIY kit Hoesje
-
US$2.79
-
US$39.55
LED2015 Muziekspectrumniveau Licht Multimodus DSP Equalizer EQ Stemopname Kleur Acryl Huls
-
US$15.99
120mm DC Lange-afstandsoplaadmodule DIY Draadloze voeding voor elektronische verlichting
-
US$2.99
-
US$25.99
-
US$8.99
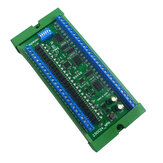
23IOA08 8CH multifunctionele RS485 externe IO module PLC DI-DO uitbreidingskaart DIN gidsrail
-
US$2.99
3 Slots 18650 Batterijhouder Plastic Opbergdoos voor 3*3.7V 18650 Lithium Batterij
-
US$19.99
23IOC24 24CH Multifunctionele RS485 Remote IO-module PLC DI-DO-uitbreidingskaart DIN-rail
-
US$6.99
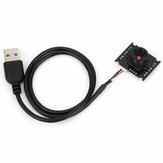
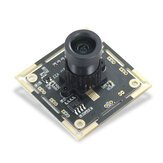
HBV-W202012HD USB-camera module aangepaste versie zonder filter
-
US$191.58
HackRF One PortaPack H2 MINI Radioplatform SDR Transceiver Spectrum Analyzer
-
US$4.99
-
US$12.59
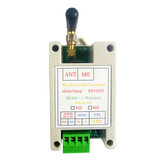
RT4AE01 433M 868M RS485 USB Draadloze Transceiver Seriële Data Langeafstands Verzenden Module
-
US$169.99
-
US$13.99
-
US$1.99
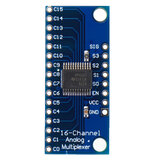
Slimme Elektronica CD74HC4067 16-Kanaals Analoge Digitale Multiplexer PCB Bord Module
-
US$2.40
-
US$2.99
-
US$14.99
-
US$33.99
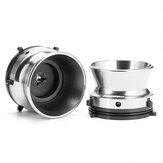
1 Paar 10 inch Blauwe Universele Opener met Aluminium NAB-hubadapter en basis voor Studer ReVox
-
US$2.99
-
US$1.99
-
US$8.99
-
US$22.99
TEAC 10 inch opening machine met haspel 10 inch opening met lege aluminium haspel
-
US$13.99
10 stuks IIC/I2C/TWI/SPI seriële poortmodule 5V 1602LCD-display voor
-
US$4.99
-
US$25.99
-
US$4.99
-
US$1.99
-
US$48.59
voor Thunderbolt GPU Dock TH3P4G3 Metalen behuizing voor grafische dock voor ATX/SFX
-
US$4.99
-
US$12.99
-
US$7.49
-
US$10.99
-
US$32.99
1 Paar 10 inch Zilveren Universele Opener met Aluminium NAB-houder voor Studer ReVox
-
US$3.99
-
US$8.99


recommendation for you
-
US$9.99
-
US$5.99
-
US$4.99
-
US$4.00
-
US$3.99
-
US$23.69
-
US$4.99
-
US$2.99
-
US$1.99
-
US$53.99
-
US$12.99
-
US$16.71
-
US$13.54
-
US$57.59
-
US$37.99
-
US$2.99
-
US$7.99
-
US$8.99